However, I couldn't find one clear guide on how to do this and had to read basically half of the net, especially to make sense of how to do this without using Heroku - which is not completely free for our intended use.
 So here is how I did it (on MacOS x), thought I'd share for the ones out there with the same problem.
1) Install nodejs, npm
So first of all we need nodejs. I have no idea about nodejs, so I used the installer. Npm should be installed automatically as well.
Then I updated npm with yeoman:
npm install -g yo generator-hubot
Then I made a folder for my new friend. He needs a home, after all. From that 'home' I created a basic Hubot setup, like this:
yo hubot --owner="OWNER <owner@example.com>" --name="BOT_NAME" --description="BOT_NAME" --adapter=slack
In your hubot's home folder, try
./bin/hubot
- if you've had enough type ' /q' to exit
4) Scripting!
Now the fun part.
I looked at the example script in the scripts folder.
If you have no idea what happens in this script, you may want to check this out first for some explanation.
After this I used SublimeText (which is by the way not too convenient out of the box when working with a new scripting language) to create a new .coffee file in the same folder as the example. Then I scripted a bot that will listen in on the chatroom, and provides the office address of the company I work for, as such:
# Description:

#   Give the office address

#

# Commands:

#   addressbot: address rotterdam - gives back the adres details


module.exports = (robot) ->

  robot.respond /address rotterdam/i, (msg) ->

    msg.send "The adres of the Rotterdam office is StreetyMcStreetFace 12, 1234XD Rotterdam"
5) Trying locally
I tried the script locally first by starting the bot as done above in step 3). It should respond when you type '[NAME_BOT] address rotterdam'.
 6) Trying in Slack with the script locally
Now I wanted to try this in a real slack chatroom.
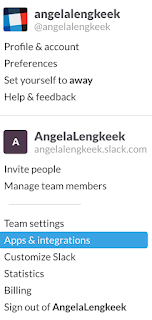
In Slack I went to Apps & Integrations and searched for Hubot.
I added a new configuration and copied the API key that Slack gave me.
Now in my terminal I started the bot like this:
HUBOT_SLACK_TOKEN=[yourtoken] ./bin/hubot -a slack
If all is well, it should work and be connected to you slack account. The addressbot entered my general channel and I could type '@addressbot address Rotterdam' to get the expected response from my dear new friend.
That's it actually, now all I still need to do is learn Coffeescript and write some more exciting bots ;)
Some of the many sources I used:
https://hubot.github.com/docs/
http://cloudmark.github.io/Hubot/
https://github.com/slackhq/hubot-slack


No comments:
Post a Comment